The Russian lip technique has become one of the most talked-about lip augmentation methods in aesthetic medicine, popularized by Russian practitioners and spread globally through social media and professional training circuits. Unlike traditional lip filler methods that focus on horizontal volume and forward projection, the Russian technique emphasizes vertical height, creating a lifted, heart-shaped upper lip with a flat frontal profile that many patients find reminiscent of a "doll lip" aesthetic.
This technique requires a fundamentally different injection approach than traditional lip augmentation and demands precise control over needle placement, injection depth, and product volume. This guide walks through the technique step by step, covers patient selection, product recommendations, and compares the results with traditional methods.
What Defines the Russian Lip Technique?
The Russian lip technique differs from traditional lip augmentation in several fundamental ways:
- Vertical injection direction: Rather than inserting the needle horizontally from the commissure through the lip body (as in traditional techniques), the Russian method involves inserting the needle vertically through the vermillion border, perpendicular to the lip surface.
- Height over volume: The goal is to create vertical lift and definition at the vermillion border rather than forward projection. The lip appears taller and more defined from the front rather than fuller from the side.
- Flat frontal profile: When viewed from the front, Russian lips have a flat or slightly concave surface across the lip body, with the height concentrated at the border. Traditional augmentation creates a convex, rounded profile.
- Heart-shaped emphasis: The technique accentuates the Cupid's bow peaks and creates a more pronounced heart shape to the upper lip.
Ideal Candidates
The Russian lip technique works best for certain lip types and patient goals. Understanding who will benefit most helps you set appropriate expectations and deliver satisfying results.
- Patients with thin but well-defined lips: Lips that have a clear Cupid's bow and vermillion border but lack volume respond beautifully to this technique, as the existing landmarks are accentuated.
- Patients seeking a defined, sculpted look: Those who want their lips to look precisely shaped and lifted rather than just "bigger" are ideal candidates.
- Younger patients with good skin quality: The technique requires the skin to "tent" over the filler deposits. Thinner, more elastic skin in younger patients conforms better to the pillared filler placement.
Patients with naturally very full or wide lips, those with significant perioral rhytids (smoker's lines), or those seeking dramatic volume augmentation may be better served by traditional techniques or a combination approach.
Product Selection
Product choice is critical for the Russian lip technique. Because filler is deposited in small, concentrated columns rather than distributed broadly through the lip, the product must be firm enough to maintain its shape as a vertical pillar without spreading laterally through the tissue.
A medium to moderately firm HA filler with good cohesivity works best. Products that are too soft will not maintain the vertical pillar structure and will spread, creating a result more similar to traditional augmentation. Products that are too firm may feel unnatural and create visible lumps.
- Juvederm Ultra XC: Good firmness and projection for maintaining pillar structure, well-tolerated
- Restylane: The original Restylane formulation has sufficient firmness for this technique
- Restylane Kysse: Offers a good balance of firmness and natural movement, though slightly softer than ideal for pronounced Russian lip results
Avoid very soft fillers like Volbella or Restylane Silk for this technique, as they lack the structural integrity to hold a vertical column shape. These products are better suited for border refinement and traditional techniques.
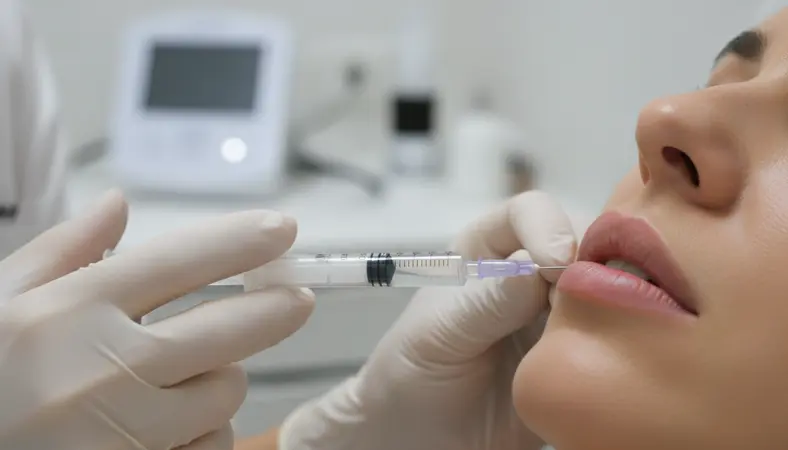
Step-by-Step Injection Technique
Step 1: Preparation and Anesthesia
Apply topical anesthetic cream (lidocaine 4-5% or a BLT compound) to the lips 15 to 20 minutes before the procedure. Clean the treatment area with chlorhexidine or alcohol. Mark the Cupid's bow peaks, the midline, and the desired injection points along the vermillion border with a surgical skin marker if needed.
Step 2: Needle Selection and Entry
Use a 27G or 30G needle, 13 mm in length. The needle enters the lip vertically through the vermillion border, perpendicular to the surface of the lip. The entry point is at the junction of the wet and dry vermillion, directly at the border.
Step 3: Needle Depth and Filler Placement
Advance the needle vertically through the lip body to the mucosa on the interior (wet side) of the lip. You should feel the needle tip approaching the mucosal surface from within. Do not fully penetrate through the mucosa. Then, inject a small bolus of filler (0.02 to 0.05 mL) in a retrograde fashion as you withdraw the needle upward toward the entry point. This creates a vertical column of filler that lifts the vermillion border upward.
Step 4: Injection Point Spacing
Space each vertical injection approximately 2 to 3 mm apart along the vermillion border. For the upper lip, start at the Cupid's bow peaks and work laterally toward the commissures, placing 5 to 8 injection points per side. For the lower lip, work from the midline laterally. Each injection creates a small vertical pillar of filler that cumulatively lifts the entire border.
Step 5: Molding and Assessment
After completing the injections, gently mold the lip between your fingers to smooth any irregularities and ensure even distribution. Assess the result with the patient in an upright position. Look for symmetry, border definition, height of the vermillion, and overall proportion relative to the lower face.
Russian Lip vs. Traditional Technique: Side-by-Side Comparison
| Feature | Russian Lip | Traditional |
|---|---|---|
| Injection direction | Vertical | Horizontal / linear threading |
| Primary goal | Height and definition | Volume and projection |
| Lip profile (front) | Flat or concave | Convex / rounded |
| Best for | Defined, sculpted lips | Full, plump lips |
| Bruising risk | Higher (more needle passes) | Lower (fewer entry points) |
| Swelling | More pronounced initially | Moderate |
| Volume per session | 0.5 - 1.0 mL typical | 0.5 - 1.0 mL typical |
Tips and Common Pitfalls
- Do not inject too superficially: If filler is deposited too close to the skin surface, it can create visible bluish discoloration (Tyndall effect) or palpable nodules. Ensure the needle penetrates to adequate depth before depositing product.
- Manage swelling expectations: The Russian technique typically produces more initial swelling than traditional methods due to the number of needle passes. Counsel patients that the final result will not be apparent for 7 to 14 days after swelling resolves.
- Do not overfill the central upper lip: It is tempting to add extra volume at the Cupid's bow, but overdoing this area creates an unnatural "shelf" appearance. Keep volumes uniform and adjust incrementally.
- Consider a hybrid approach: Many experienced injectors combine Russian technique at the border for height and definition with small amounts of traditional horizontal threading in the lip body for a balanced result that has both structure and softness.
The Russian lip technique is an advanced skill that requires supervised hands-on training to master safely. Our Lip Filler Certification course covers this technique alongside traditional methods, ensuring you develop the versatility to offer every patient the approach best suited to their anatomy and goals.